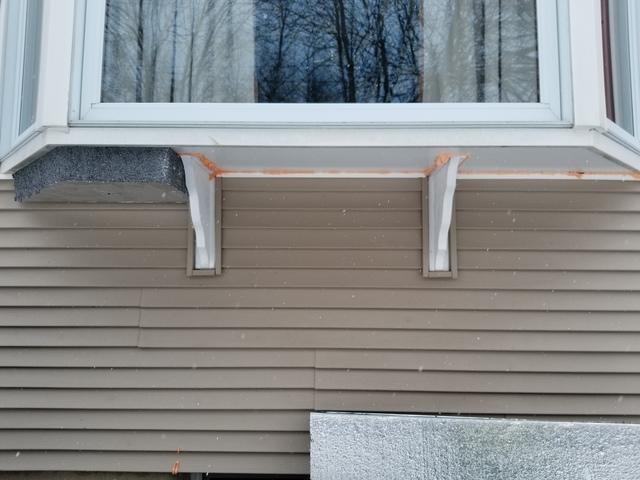
![Before Photo](https://cdn.treehouseinternetgroup.com/uploads/photo_gallery/medium/167056-5a4ceefa6877b_feef8cff16fdd5f9c423f6094a0c4f85.jpeg?v=)
Before Photo
This is how the underside of the window looked when we got there. Notice all the gaps that air can use to move into the home!
![During one of the steps in the process.](https://cdn.treehouseinternetgroup.com/uploads/photo_gallery/medium/167057-5a4cef5e7f799_20171230110705.jpg?v=)
During one of the steps in the process.
This is after we airsealed the gaps and started using our silverglo foam board to insulate.
![During one of the last steps in the process](https://cdn.treehouseinternetgroup.com/uploads/photo_gallery/medium/167058-5a4cf027a4c93_20171230112326001.jpg?v=)
During one of the last steps in the process
Now that the silverglo and plywood are up, it's time to clean up and put the finishing touches on this treatment.
![Finished!](https://cdn.treehouseinternetgroup.com/uploads/photo_gallery/medium/167059-5a4cf17f15248_20171230113857.jpg?v=1650466925)
Finished!
Now that this bay window is insulated this home is one step closer to being more comfortable and energy efficient!